
Available now
6 × 6 m open-ended container shelter

C2020 · 6 × 6 m
See how it fits together
Explore the frame and fixing details in the manufacturer's manual illustrations. Click any image for a closer look.
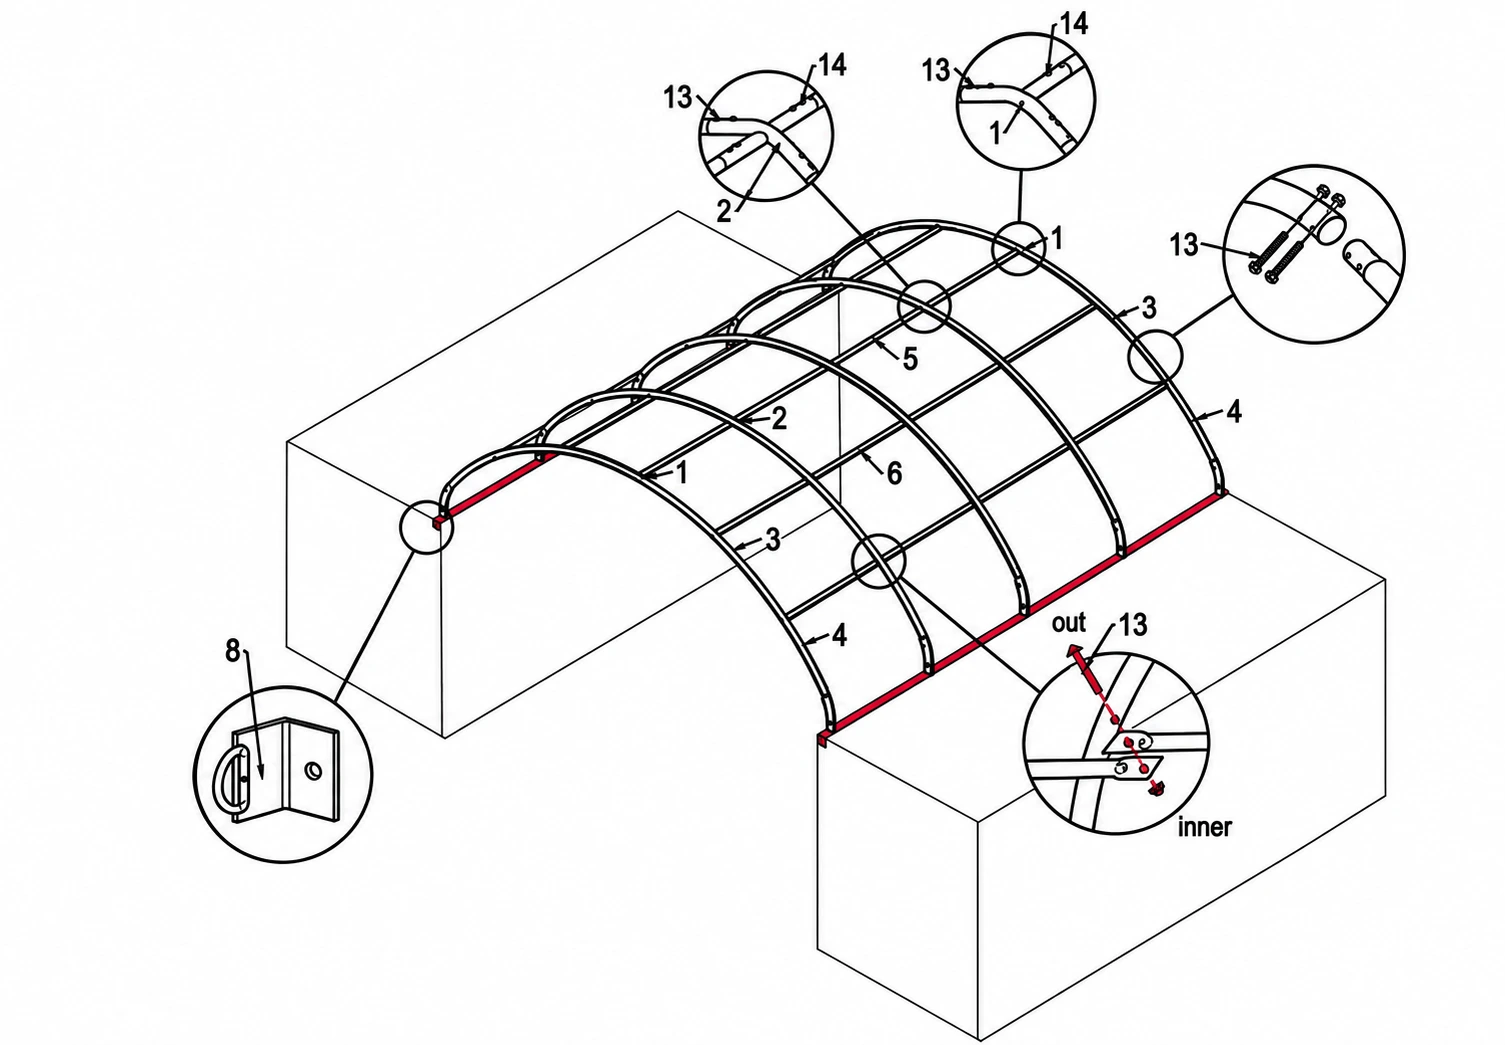
Arches and frame connections
Arch sections connect with M8 × 70 bolts. One top and four side purlins join each pair of arches.
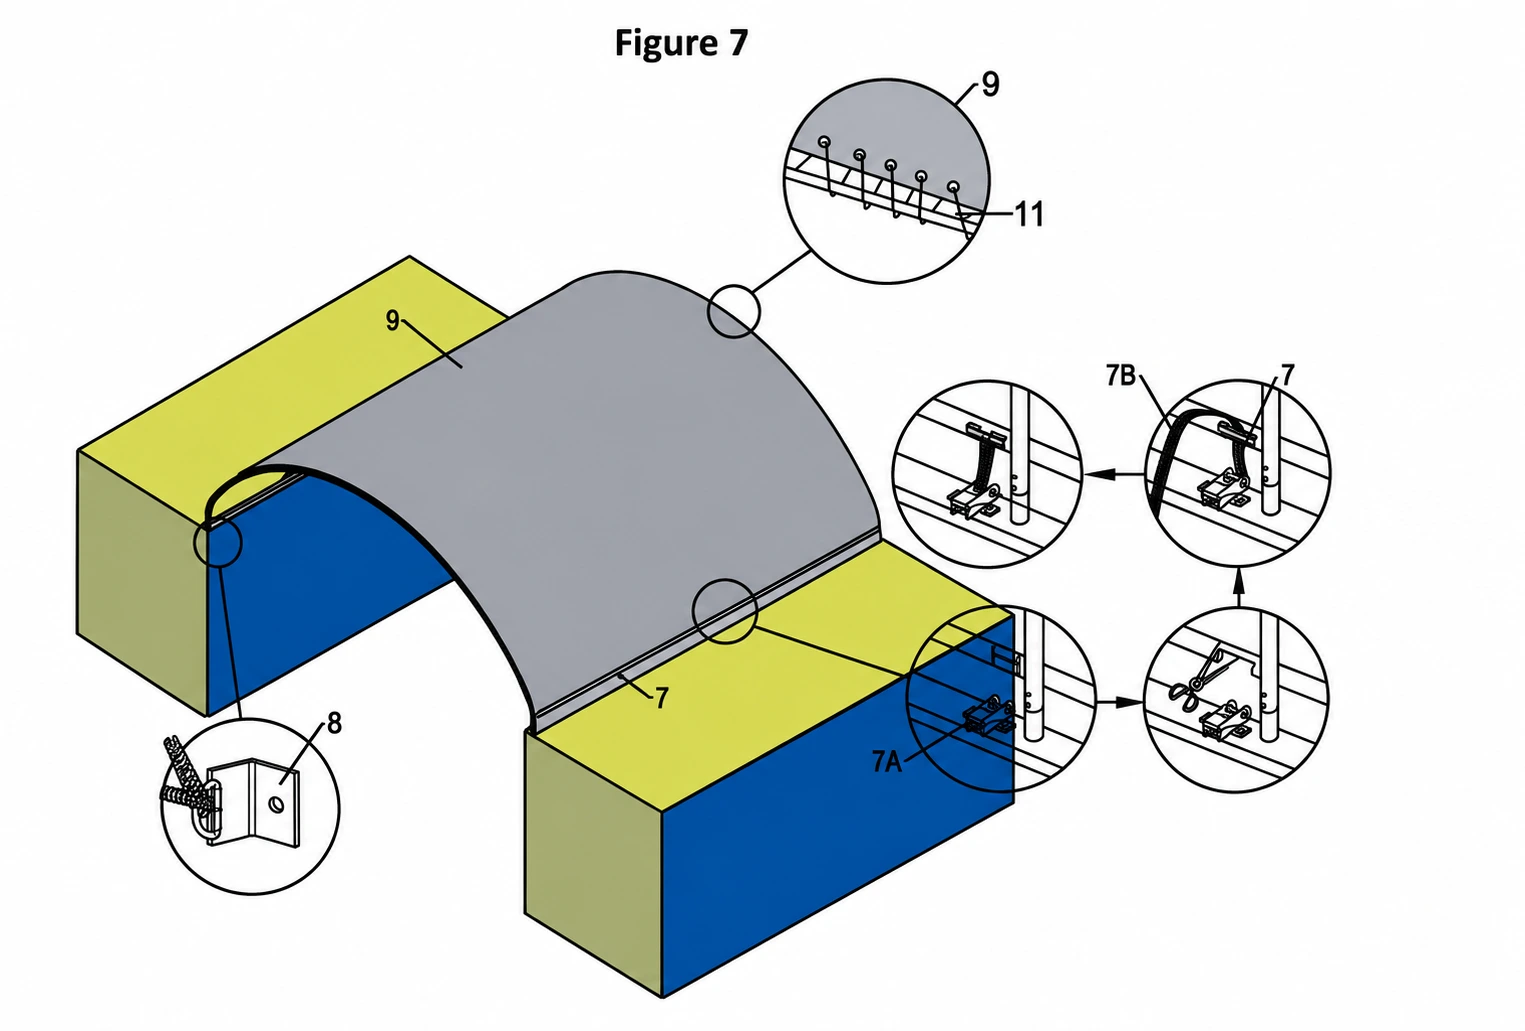
Securing the roof cover
Lacing at the end arches, tension tubes in the side pockets and ratchet straps keep the cover evenly tensioned.
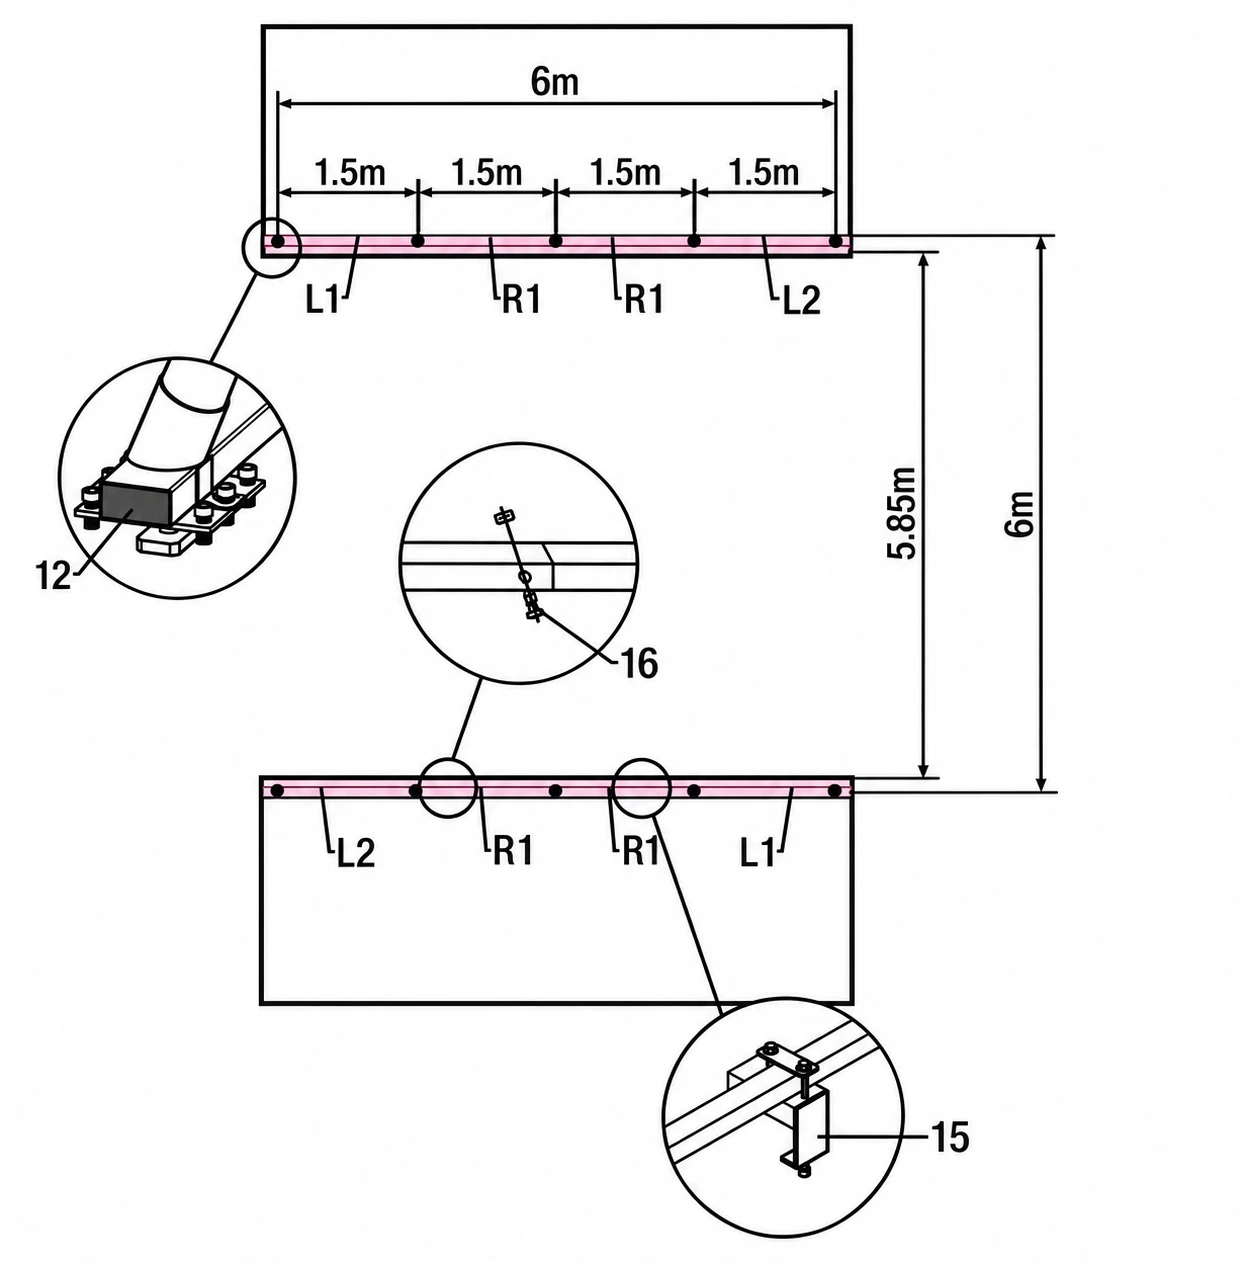
Base layout
Check that both support lines are parallel and the base layout is square before assembly.
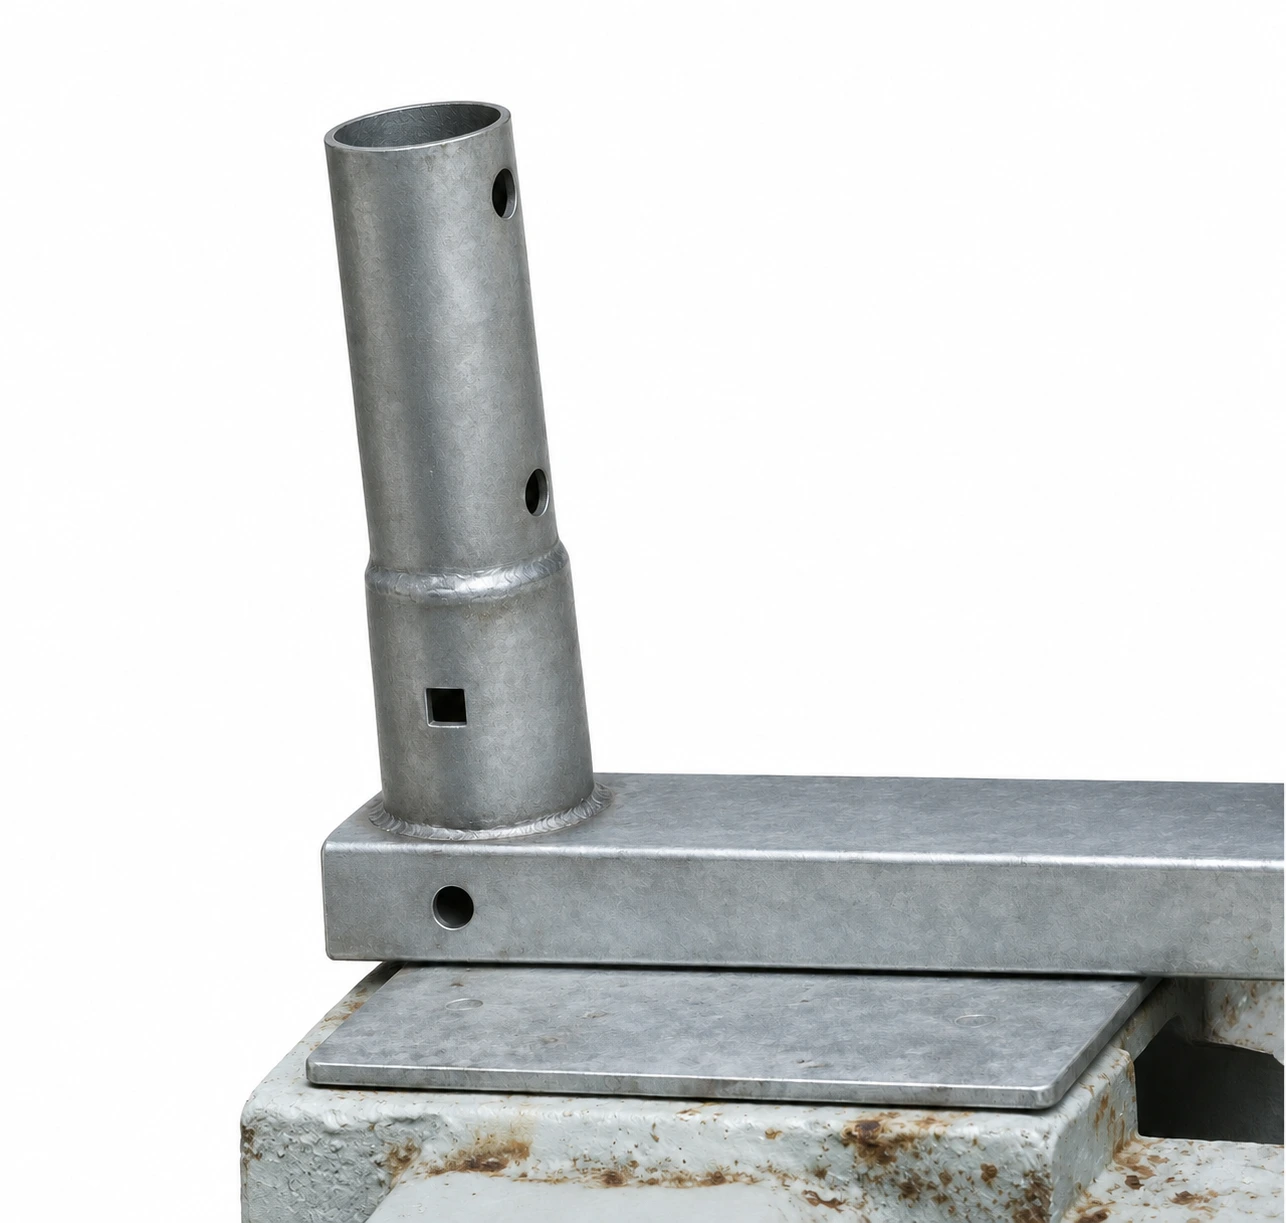
Corner support
Detail shown in the manual. Confirm the fixing method supplied with your kit before installation.
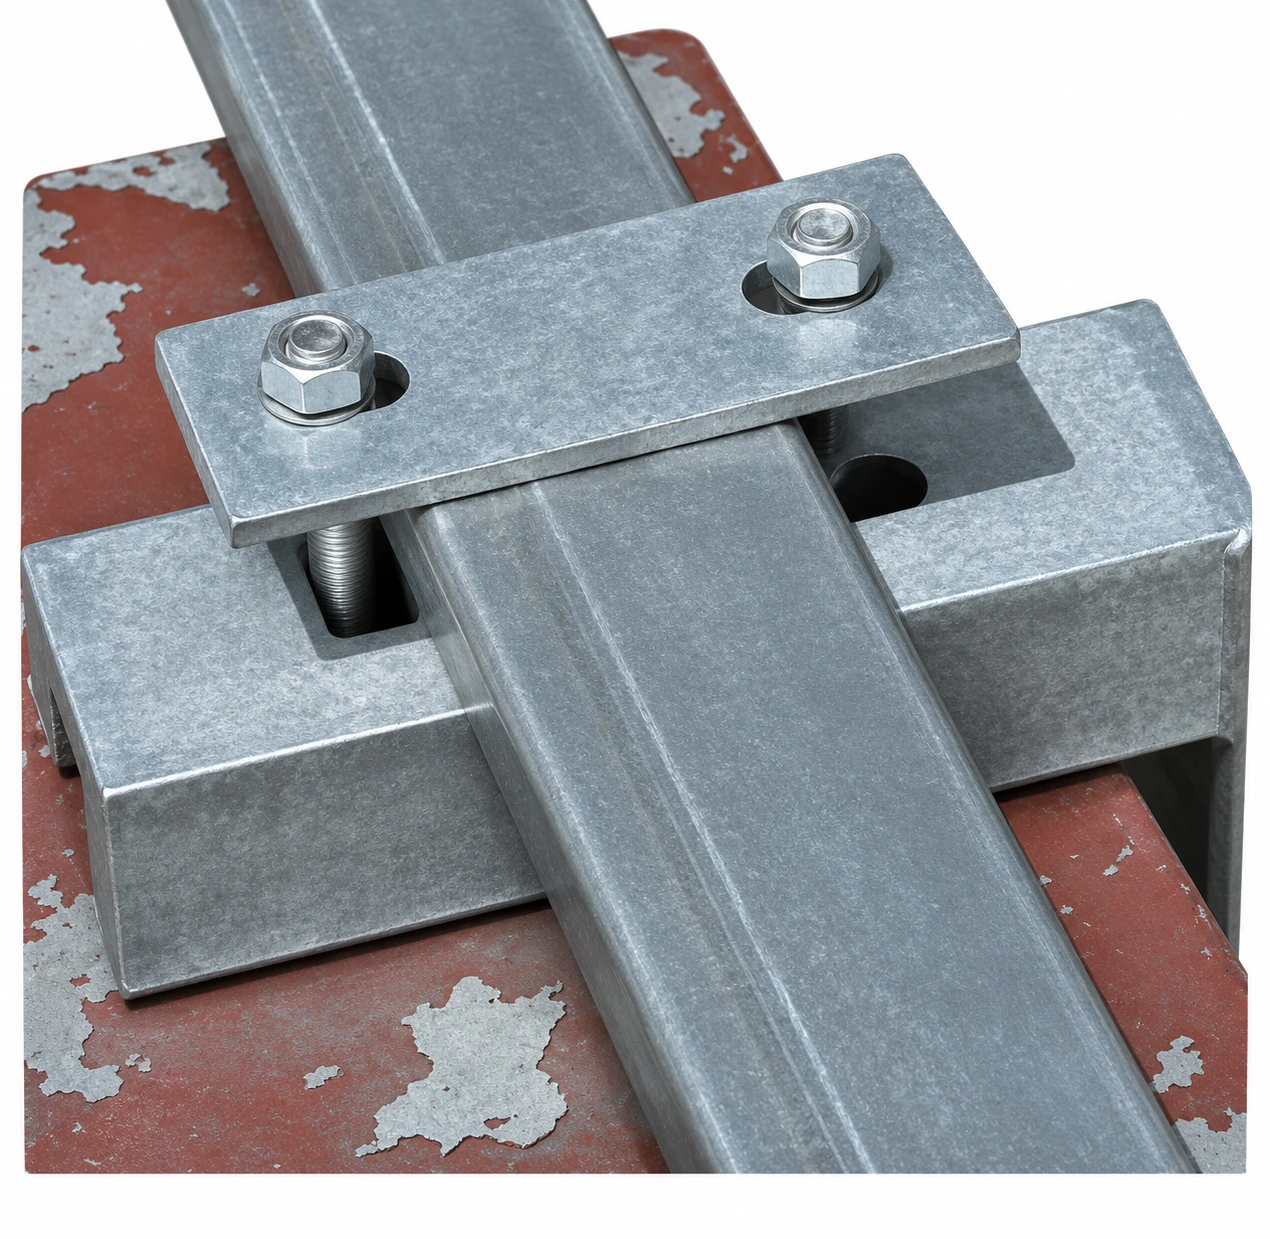
Base rail connection
Detail shown in the manual. Confirm the fixing method supplied with your kit before installation.
6 × 6 m open-ended container shelter
Available in stock
Unload at one end and pick up at the other. The C2020 turns the gap between two containers into a covered work bay with open access at both ends.
- Covered area
- 36 m²
- PVC cover
- 500 g/m²
- Steel arches
- 5
- Length × span
- 6 × 6 m
- Arch spacing
- 1.5 m
- Arch rise above mounts
- 2 m
Specifications & installation
Open a section to explore the details.
01Dimensions and construction
- C2020 — 6 × 6 m, 36 m² covered area, open at both ends.
- 5 arches at 1.5 m centres. Arch tubes are 45 × 1.5 mm and connecting profiles are 32 × 1.2 mm; the steel is galvanised.
- 500 g/m² PVC cover. The arch rises 2 m above its mounts; ground clearance depends on container height and position beneath the arch.
02How the shelter attaches to containers
- Mark out both rows of supports first, checking that they are parallel and the base is square. Dimensions in the installation drawing are measured between tube centres.
- The arches sit on longitudinal base rails. The manual photographs show a corner fitting with a rotating lock, intermediate supports and bolted connecting plates.
- The C2020 instructions specify welding the base plates to the containers. Check the actual fittings and fixing method against the supplied kit before installation.
- Separate angle seats, part 8, for securing the cover are also welded to the containers.
03How the frame is assembled
- Join the sections of each arch using M8 × 70 bolts. Position the fasteners clear of the top surface where the cover will rest.
- Once the first two arches are in place, connect them with one top purlin and four side purlins.
- Add each remaining arch in turn and connect it to the assembled frame.
04How the roof cover is secured
- Carefully pull the cover over the completed frame and centre it evenly.
- Lace the ends to the end arches and secure them to the angle seats. Insert the lower tension tubes into the side pockets.
- Tension the tubes with the ratchet straps and fit the plastic end caps.
- Keep the cover evenly tensioned without sagging sections. Fit it in light wind conditions and keep it attended until all fixings are secured.
05Parts listed in the manual
The C2020 manufacturer's list includes the frame and base elements, roof cover, 8 lower tension-tube sections in two groups, 10 ratchets with straps, 4 angle seats, ropes, bolts and caps. Preparation tools listed are a measuring tape, alignment string, stepladder, sledgehammer, wrench and scissors; welded fixings also require welding equipment. Confirm the supplied contents in your quotation.
06Maintenance, snow and wind
- Check the tension every month and adjust as needed. A cover installed in cold weather can loosen as temperatures rise and require retensioning.
- Remove snow immediately if it stays on the roof. Galvanising helps protect the steel against corrosion, while correct tension helps the cover hold its shape.
- Keep heat sources and open flames away from the cover. Provide ventilation when operating equipment beneath the shelter.
- The supplied manual gives no rated snow or wind loads or service life in years. Ask for these parameters to be confirmed for your site.
07What to send for a quotation
Send the dimensions and photographs of your containers, the installation address and the clearance you need. Include your chosen model and operating conditions so the fittings, supplied contents, price and delivery can be checked.
Get a price quote
Fill out the form and we will get back to you within 5 minutes.